Organization Settings
Your JetStack AI organization is the top-level container for your team’s portals, assets, audits, and activity history. Organization settings let you customize your workspace identity and manage who has access to what.
Accessing Organization Settings
Section titled “Accessing Organization Settings”Navigate to Settings > Organization from the left sidebar, or click your organization name in the top-left corner and select Organization Settings.
Organization Profile
Section titled “Organization Profile”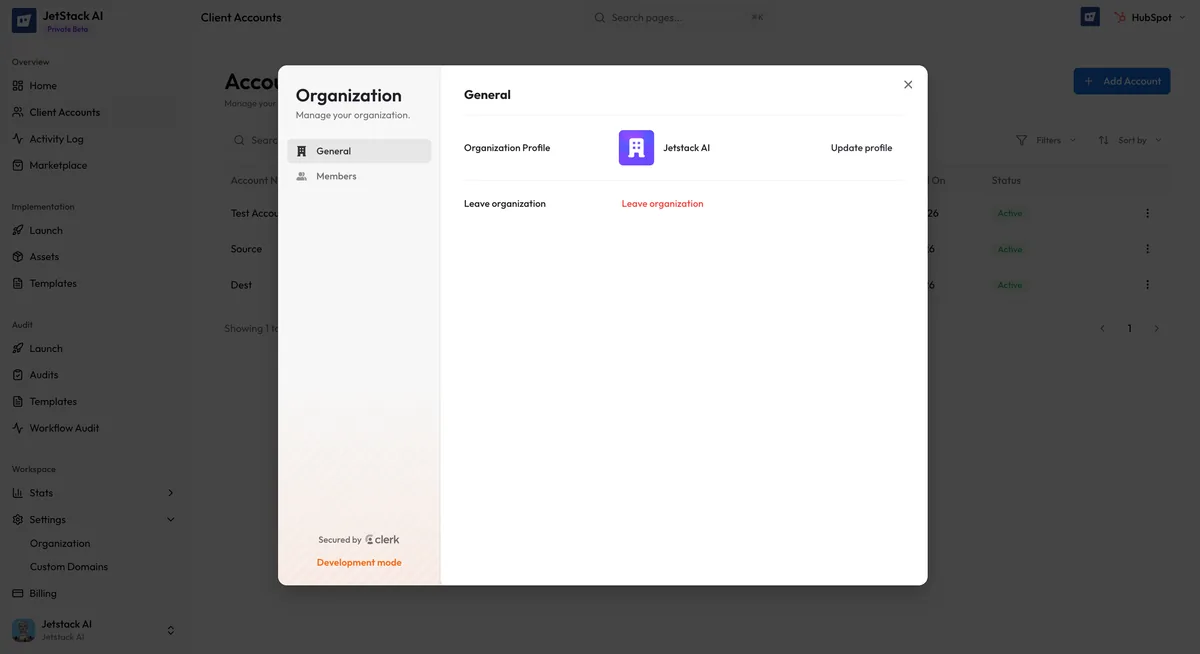
Organization Name
Section titled “Organization Name”Your organization name appears throughout JetStack AI — in the sidebar, in shared audit reports, and in team invitations. To change it:
- Go to Settings > Organization.
- Click the Organization Name field.
- Enter the new name.
- Click Save.
The name change takes effect immediately across all areas of the application. Shared report URLs are not affected by name changes.
Organization Logo
Section titled “Organization Logo”Upload a logo to brand your JetStack AI workspace. The logo appears in the sidebar header and can be used in audit report branding.
- Supported formats — PNG, JPG, SVG
- Recommended size — 200x200 pixels minimum. The logo is displayed at various sizes throughout the application, so a square format works best.
- File size limit — 2 MB maximum
To upload or replace your logo:
- Go to Settings > Organization.
- Click the logo placeholder (or existing logo) in the profile section.
- Select an image file from your computer.
- The logo uploads and displays immediately.
To remove the logo, click the remove icon next to the uploaded logo. The organization will revert to displaying the organization name as text.
Member Management
Section titled “Member Management”Organization settings include a member roster showing everyone who has access to your JetStack AI workspace.
Viewing Members
Section titled “Viewing Members”The member list displays:
| Column | Description |
|---|---|
| Name | The team member’s display name |
| The email address associated with their JetStack AI account | |
| Role | Their assigned role (Owner, Admin, Member) |
| Joined | Date they joined the organization |
| Last Active | Most recent activity timestamp |
JetStack AI uses three roles to control access within an organization:
| Role | Permissions |
|---|---|
| Owner | Full access to all features. Can manage billing, delete the organization, and transfer ownership. Only one Owner per organization. |
| Admin | Full access to portals, assets, audits, and activity. Can invite and remove members, change member roles, and manage organization settings. Cannot manage billing or delete the organization. |
| Member | Can use all core features — import assets, deploy implementations, run audits, view activity. Cannot invite or remove members, change roles, or modify organization settings. |
Changing a Member’s Role
Section titled “Changing a Member’s Role”Owners and Admins can change roles for other members:
- Go to Settings > Organization.
- Find the member in the roster.
- Click the role dropdown next to their name.
- Select the new role.
- The change takes effect immediately.
The Owner role can only be transferred, not assigned to multiple people. To transfer ownership, the current Owner must explicitly transfer it to another Admin.
Removing a Member
Section titled “Removing a Member”To remove a team member from the organization:
- Find the member in the roster.
- Click the Remove action (trash icon) next to their entry.
- Confirm the removal in the dialog.
Removed members immediately lose access to the organization, all connected portals, and all assets. Their past activity (imports, deployments, audits) remains in the Activity Log attributed to their name.
Inviting Members
Section titled “Inviting Members”To add new team members, see Team Management for the full invitation workflow.
Deleting an Organization
Section titled “Deleting an Organization”Only the Owner can delete an organization. This action is irreversible and removes:
- All portal connections
- All imported assets
- All audit reports
- All activity history
- All member access
Deletion requires entering the organization name as confirmation. If you are unsure, consider removing individual portals or members instead.