Adding a Portal
Every HubSpot portal you work with needs to be connected to JetStack AI before you can import assets, deploy implementations, or run audits against it. Adding a portal takes under a minute and uses HubSpot’s standard OAuth 2.0 authorization flow — no API keys or manual token management required.
How to Add a Portal
Section titled “How to Add a Portal”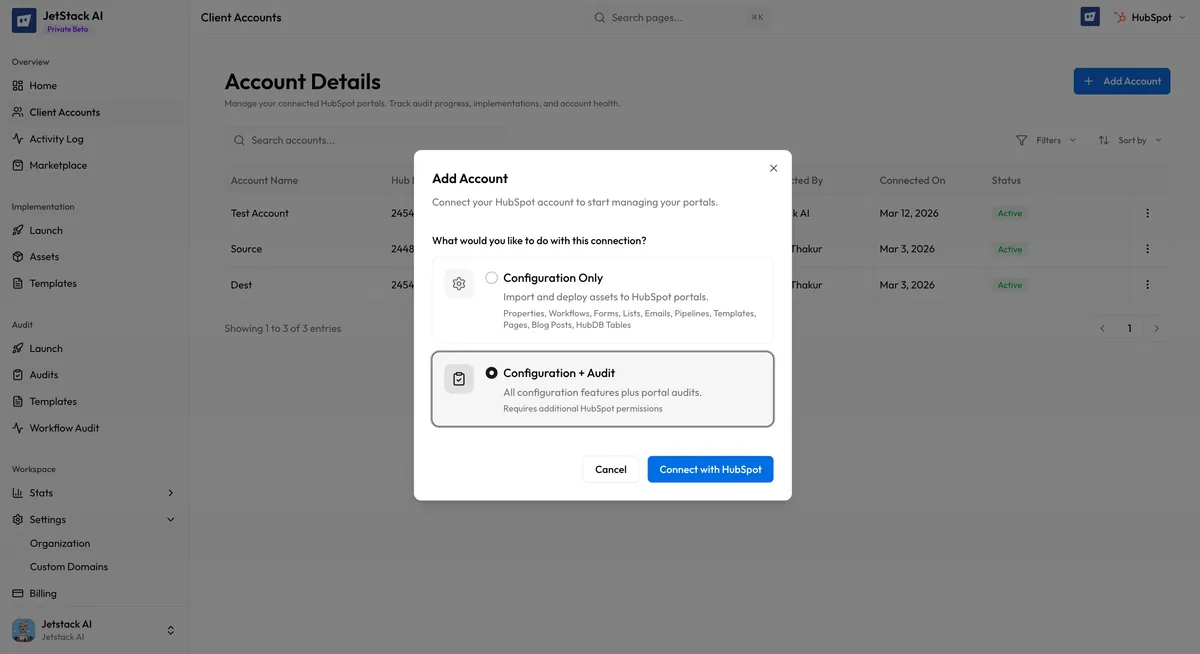
- Navigate to Client Accounts in the left sidebar.
- Click Add Portal in the top-right corner of the portal table.
- You are redirected to HubSpot’s OAuth authorization screen. Select the portal you want to connect from the account picker.
- Review the requested permissions and click Connect app.
- HubSpot redirects you back to JetStack AI. The new portal appears in your Client Accounts table immediately.
Once the connection is established, JetStack AI auto-fetches the portal name and portal ID from HubSpot. You do not need to enter these manually. The portal name displayed in JetStack AI always matches the name configured in HubSpot’s account settings.
Connection Types
Section titled “Connection Types”When adding a portal, you select a connection type that determines what JetStack AI can do with that portal:
| Connection Type | What It Enables |
|---|---|
| Config Only | Importing and deploying assets (implementations only). No audit access. |
| Config + Audit | Full access — import, deploy, and run audits against this portal. |
| Audit Only | Run audits against this portal. No import or deploy access. |
Choose the connection type that matches how you intend to use the portal. You can change the connection type later by editing the portal entry.
- Config Only is best for destination portals where you only deploy assets.
- Config + Audit is the most common choice for client portals where you need both implementation and audit capabilities.
- Audit Only is useful for prospects or clients where you are only running an audit before a sales conversation.
What Gets Auto-Fetched
Section titled “What Gets Auto-Fetched”After the OAuth flow completes, JetStack AI retrieves the following from HubSpot automatically:
- Account Name — The portal’s display name from HubSpot settings
- Portal ID — The unique numeric identifier for the HubSpot account
- Hub tier — The HubSpot subscription level (Free, Starter, Professional, Enterprise)
This information populates the portal row in the Client Accounts table and is used throughout JetStack AI when displaying portal references.
Portal Table View
Section titled “Portal Table View”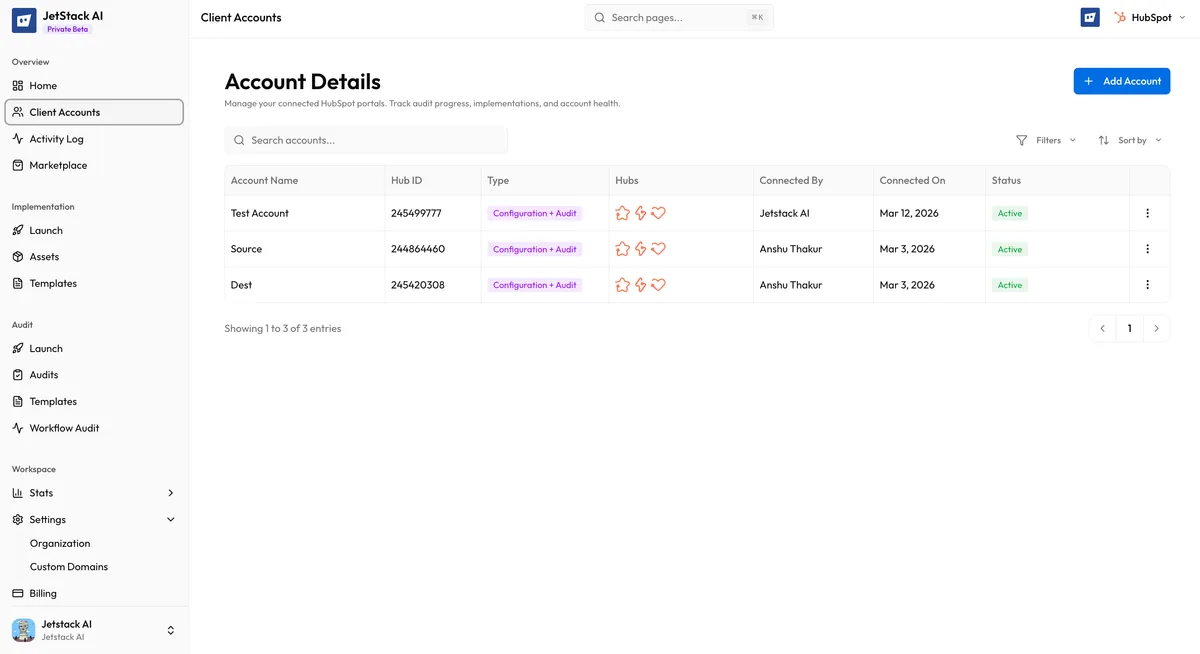
After adding one or more portals, the Client Accounts page displays a table with the following columns:
| Column | Description |
|---|---|
| Account Name | The HubSpot portal name, auto-fetched from HubSpot |
| Portal ID | The numeric HubSpot portal identifier |
| Connection Status | Current state of the OAuth connection (see Reconnecting a Portal) |
| Actions | Edit connection type, reconnect, or remove the portal |
Portal Limits by Plan
Section titled “Portal Limits by Plan”Your JetStack AI plan determines how many portals you can connect simultaneously:
- Pro — Up to 3 client accounts
- Ultimate — Up to 10 client accounts
- Custom — Unlimited client accounts
If you reach your portal limit, you will need to remove an existing portal or upgrade your plan before adding a new one. See Billing & Plans for upgrade options.
Prerequisites
Section titled “Prerequisites”Before adding a portal, confirm the following:
- HubSpot Admin access — You must have Super Admin or Admin permissions on the portal you are connecting. Standard users cannot authorize the required OAuth scopes.
- Portal not already linked — Each HubSpot portal can only be connected to one JetStack AI organization at a time. If the portal is linked to another JetStack AI organization, disconnect it there first.
- Supported browser — Use a modern browser (Chrome, Firefox, Edge, Safari) with pop-up blockers disabled for
app.hubspot.comandapp.jetstack.ai.
For a detailed walkthrough of the OAuth process itself, including the specific scopes requested, see OAuth Connection Flow.