Creating Custom Templates
Custom templates let you build audit configurations tailored to your specific needs. Instead of using a pre-built template as-is, you can select exactly which blocks to include, configure the report type, set branding, and save the template for repeated use.
When to Create a Custom Template
Section titled “When to Create a Custom Template”Custom templates are useful when:
- You serve a niche industry with specific audit requirements not covered by pre-built templates
- Your engagement scope is narrow — you only audit certain areas for certain clients
- You want a branded template with specific colors, logos, and footer text baked in
- You run recurring audits for the same client and want consistency across reports
- You want different depth levels — a quick assessment template and a deep-dive template
Creating a Template Step by Step
Section titled “Creating a Template Step by Step”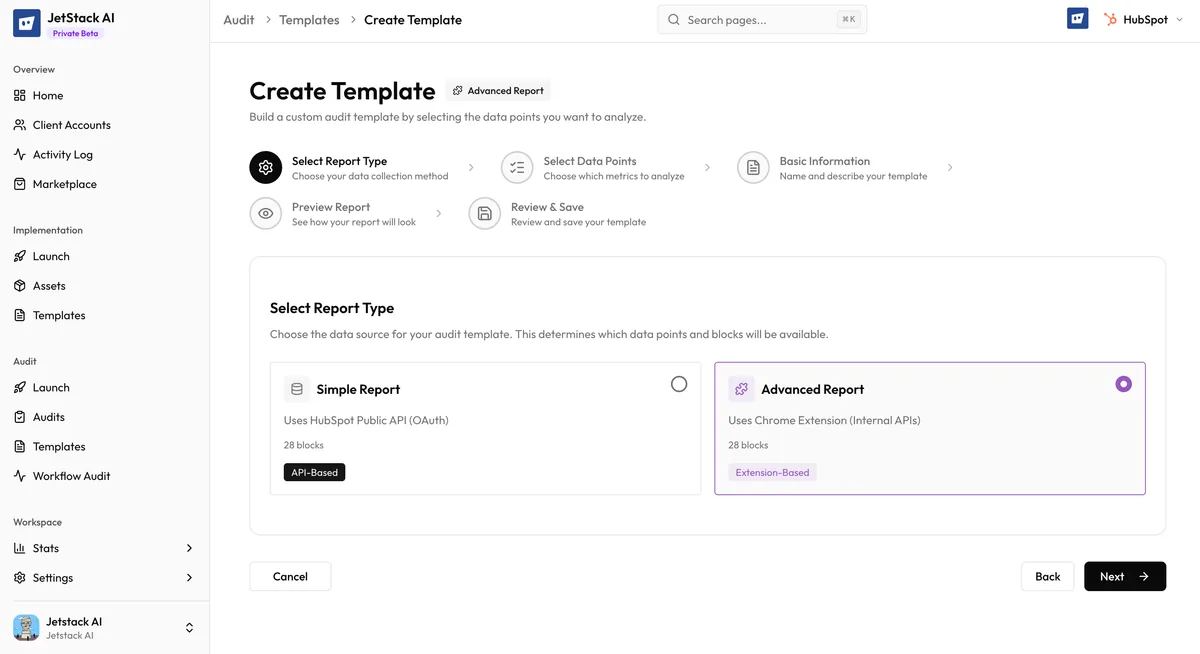
Step 1: Start the Template
Section titled “Step 1: Start the Template”- Navigate to Audits > Templates in the sidebar.
- Click Create Template.
- Enter a template name — use something descriptive like “SaaS Full Audit” or “Q1 Sales Review.”
- Add an optional description explaining when and how to use this template.
Step 2: Select Blocks
Section titled “Step 2: Select Blocks”The block selector shows all available audit blocks organized by section:
- General — Portal settings, user management, GDPR, data hygiene, integrations, naming conventions
- Sales — Pipelines, deal stages, sequences, quotes, meetings, forecasting
- Marketing — Forms, CTAs, emails, landing pages, SEO, social
- Automation — Workflows, enrollment, branching, suppression, re-enrollment
- Service — Tickets, knowledge base, surveys, SLAs
- Reporting — Dashboards, custom reports, attribution, analytics
For each block, you can:
- Include — The block will be evaluated and scored in audits using this template
- Exclude — The block will not appear in the audit
Click each block to toggle its inclusion. You can also use Select All or Deselect All at the section level.
Step 3: Configure Report Type
Section titled “Step 3: Configure Report Type”Choose between two report types:
| Type | Description | Best For |
|---|---|---|
| SIMPLE | Streamlined output with key findings, scores, and top-level insights | Quick assessments, initial client conversations, executive presentations |
| ADVANCED | Full detail with every data point, granular scores, and comprehensive insights | Deep-dive audits, detailed improvement planning, technical teams |
The report type affects how much detail appears in the generated report. Both types use the same underlying data and scoring — the difference is in presentation depth.
Step 4: Set Branding
Section titled “Step 4: Set Branding”Configure the default branding for reports generated from this template:
- Primary color — The main accent color
- Secondary color — Supporting color for backgrounds and borders
- Font family — The typeface for the report
- Company logo URL — Your logo
- Client logo URL — Optionally bake in a specific client’s logo (useful for client-specific templates)
- Footer text — Default footer content
Branding set here serves as the default when using this template. It can still be overridden at the individual audit level.
Step 5: Mark Premium Requirements
Section titled “Step 5: Mark Premium Requirements”If your template includes blocks that require specific plan features, mark the template’s premium requirements:
- Premium blocks — Some data points require higher API access or specific HubSpot hub subscriptions
- Custom domain — If the template is intended for use with custom domain reports (Ultimate plan)
- Advanced AI insights — If the template expects full AI insight generation
Marking premium requirements ensures users see clear messaging if their plan does not support all features in the template.
Step 6: Save the Template
Section titled “Step 6: Save the Template”- Review your configuration — blocks, report type, branding, and premium requirements.
- Click Save Template.
- The template appears in your Custom Templates list, ready to use for any audit.
Starting from a Clone
Section titled “Starting from a Clone”Instead of building from scratch, you can clone an existing template (pre-built or custom) and modify it:
- Find the template to clone in Audits > Templates.
- Click Clone.
- A new template is created with all the same settings.
- Modify the name, blocks, report type, branding, or premium requirements as needed.
- Save the modified version.
Cloning is the fastest way to create variations — for example, a “Full Audit” and a “Quick Scan” version of the same configuration.
Template Organization
Section titled “Template Organization”As you create multiple templates, keep them organized:
- Use clear names — Include the client name, industry, or scope in the template name
- Add descriptions — Note when to use each template and what makes it different from similar templates
- Archive unused templates — Keep your template list manageable by removing templates you no longer use (see Managing Templates)