Deploying Assets via Extension
The Chrome Extension includes a full deployment wizard that lets you push imported assets to a destination HubSpot portal without leaving the sidebar. The wizard walks you through four steps: selecting assets, configuring mappings, reviewing the deployment plan, and executing the deploy with conflict resolution. This page covers each step in detail.
Opening the Deploy Wizard
Section titled “Opening the Deploy Wizard”- Open the JetStack AI sidebar on any HubSpot page.
- Tap the Deploy tab in the bottom navigation, or tap the Deploy quick action card on the Home screen.
- The wizard opens at Step 1.
Step 1 — Select Assets
Section titled “Step 1 — Select Assets”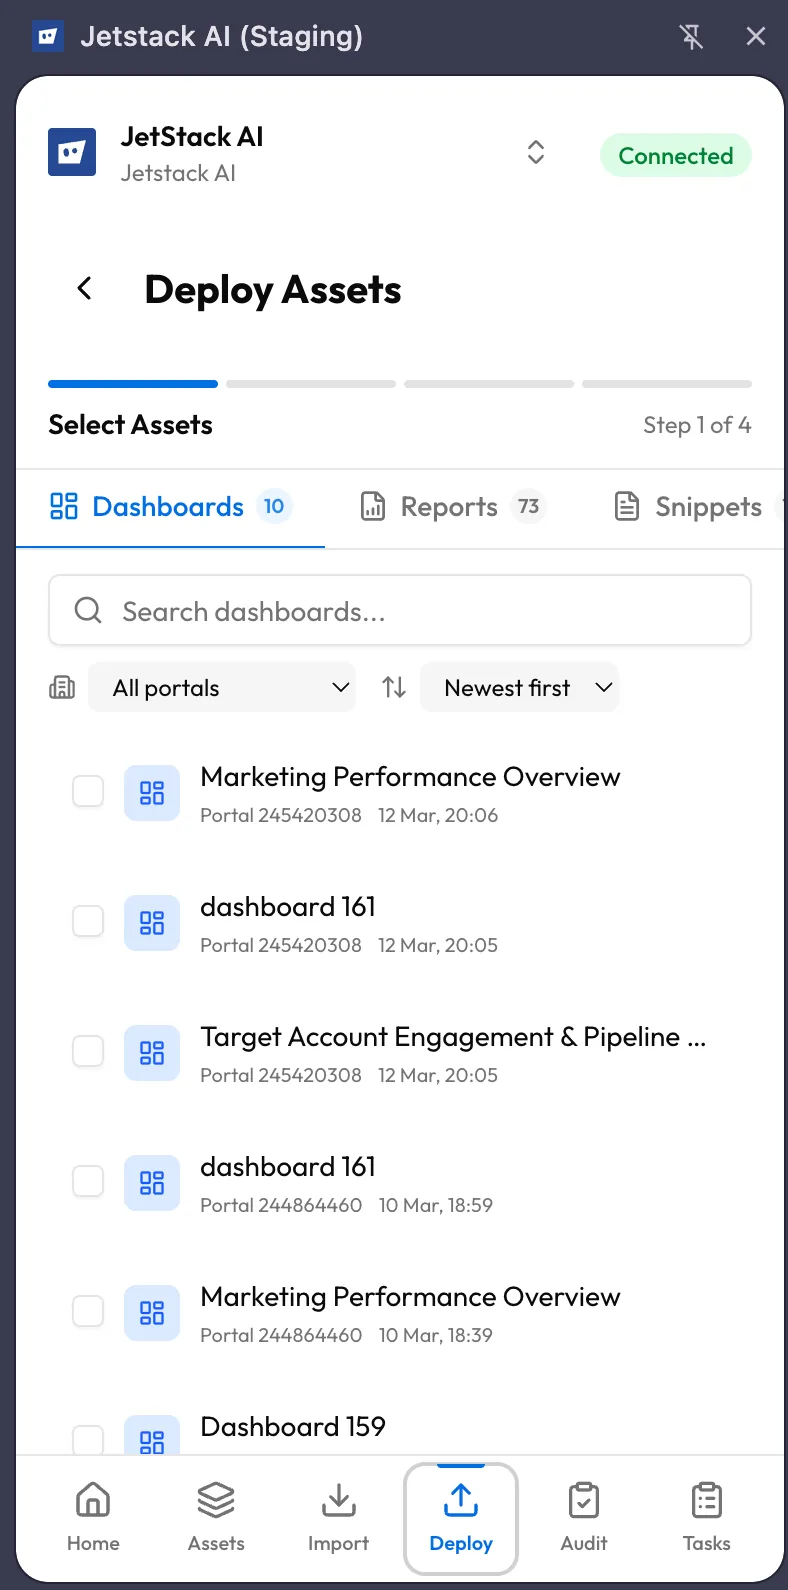
The first step presents your full library of imported assets. You choose which assets to include in this deployment.
Filtering
Section titled “Filtering”- Filter by type — A dropdown or tabbed filter lets you narrow the list to a specific asset type (dashboards, reports, snippets, etc.).
- Filter by portal — If your workspace has assets from multiple source portals, filter to see only assets from a particular portal.
- Search — Type in the search bar to find assets by name. The search is instant and matches against asset names.
- Sort — Sort the asset list by name, type, or import date to locate what you need quickly.
Selection
Section titled “Selection”Tap assets to select them. Selected assets display a checkmark. A selection counter at the bottom shows how many assets are queued for deployment. You can combine assets of different types in a single deployment.
When you are satisfied with your selection, tap Next to proceed to Step 2.
Step 2 — Configure Mapping
Section titled “Step 2 — Configure Mapping”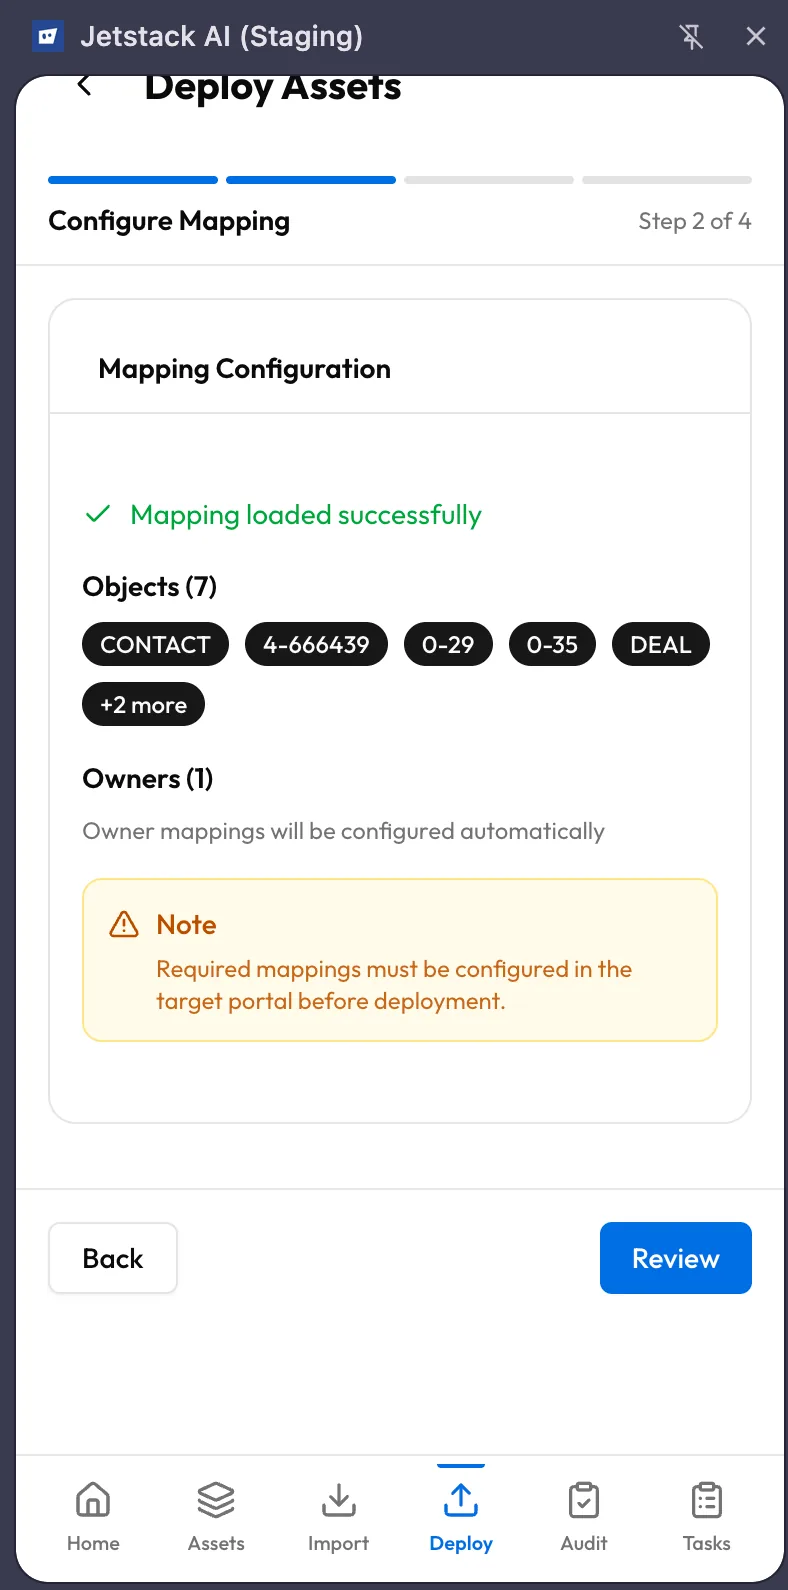
Deployment often requires mapping source portal entities to their equivalents in the destination portal. Step 2 surfaces these mappings and lets you configure them.
Property Mappings
Section titled “Property Mappings”If the assets you are deploying reference properties that exist in the source portal, JetStack AI checks whether matching properties exist in the destination. The mapping screen lists each property and shows:
- Source property — The property name and internal name from the source portal
- Destination match — The automatically detected match in the destination portal, if one exists
- Status — Matched (green), Unmatched (yellow), or Conflict (red)
For unmatched properties, you can:
- Select a different destination property from a dropdown
- Choose to auto-create the property in the destination portal during deployment
- Skip the property (the asset deploys without that property reference)
Object Type Mappings
Section titled “Object Type Mappings”If assets reference custom objects or object types that differ between portals, those mappings appear here as well. The same matched/unmatched/conflict pattern applies.
Validation
Section titled “Validation”The bottom of the mapping screen shows a validation summary. If there are unresolved conflicts that would cause the deployment to fail, the Next button is disabled until you resolve them. Warnings (non-blocking) are displayed but do not prevent you from proceeding.
Tap Next when all required mappings are configured.
Step 3 — Review
Section titled “Step 3 — Review”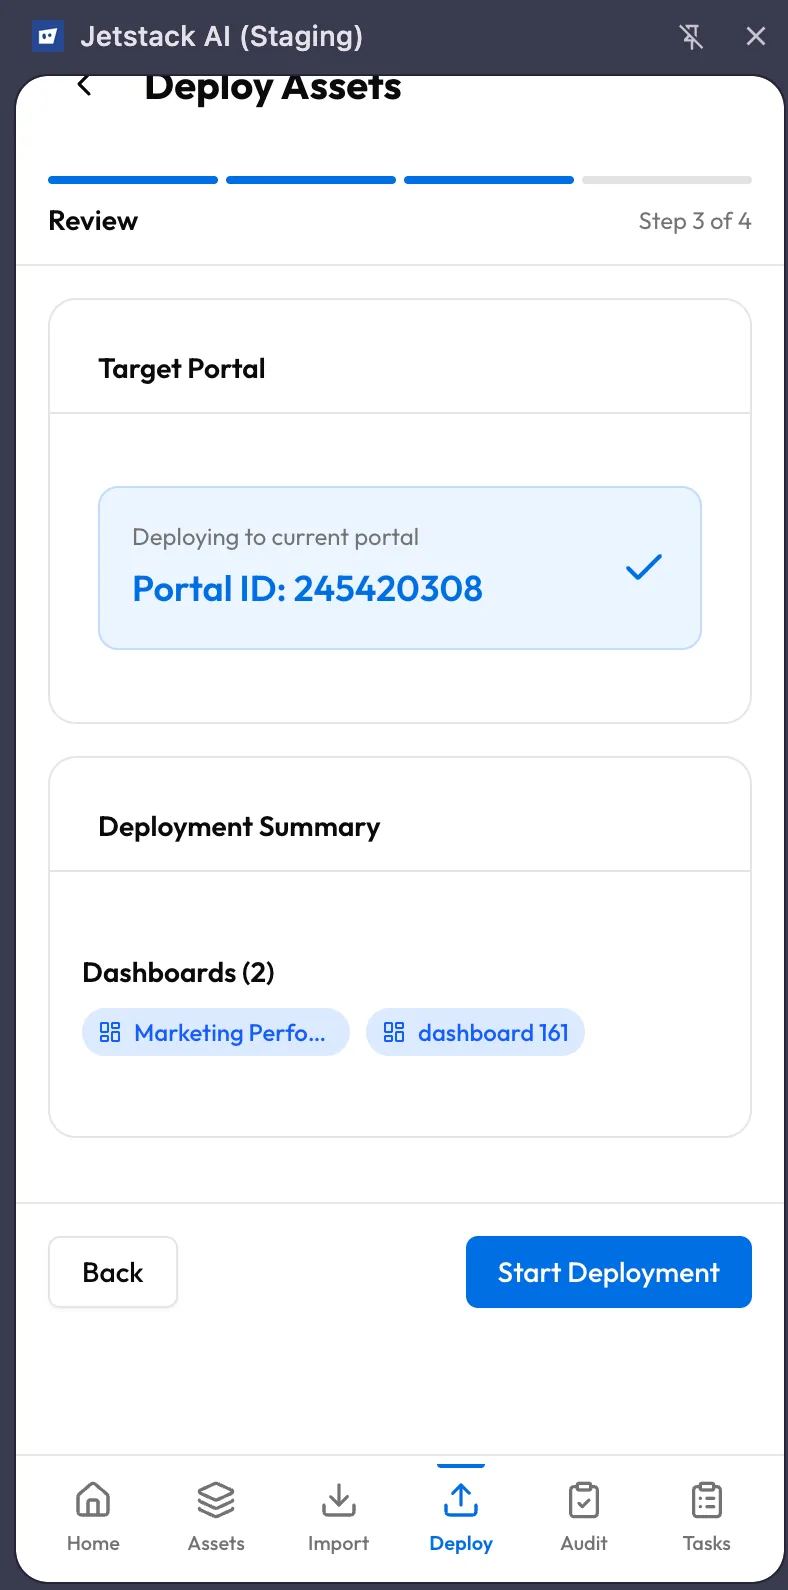
The review step shows a complete summary of what will happen when you deploy:
- Asset list — Every asset included in the deployment, grouped by type, with a count
- Mapping summary — The property and object type mappings you configured, including any auto-create actions
- Destination portal — The target portal name and ID
- Potential issues — Any warnings or notes about the deployment (e.g., “3 properties will be auto-created”)
Read through the review carefully. If anything looks wrong, use the Back button to return to the previous step and adjust.
When you are ready, tap Deploy to start execution.
Step 4 — Deploy
Section titled “Step 4 — Deploy”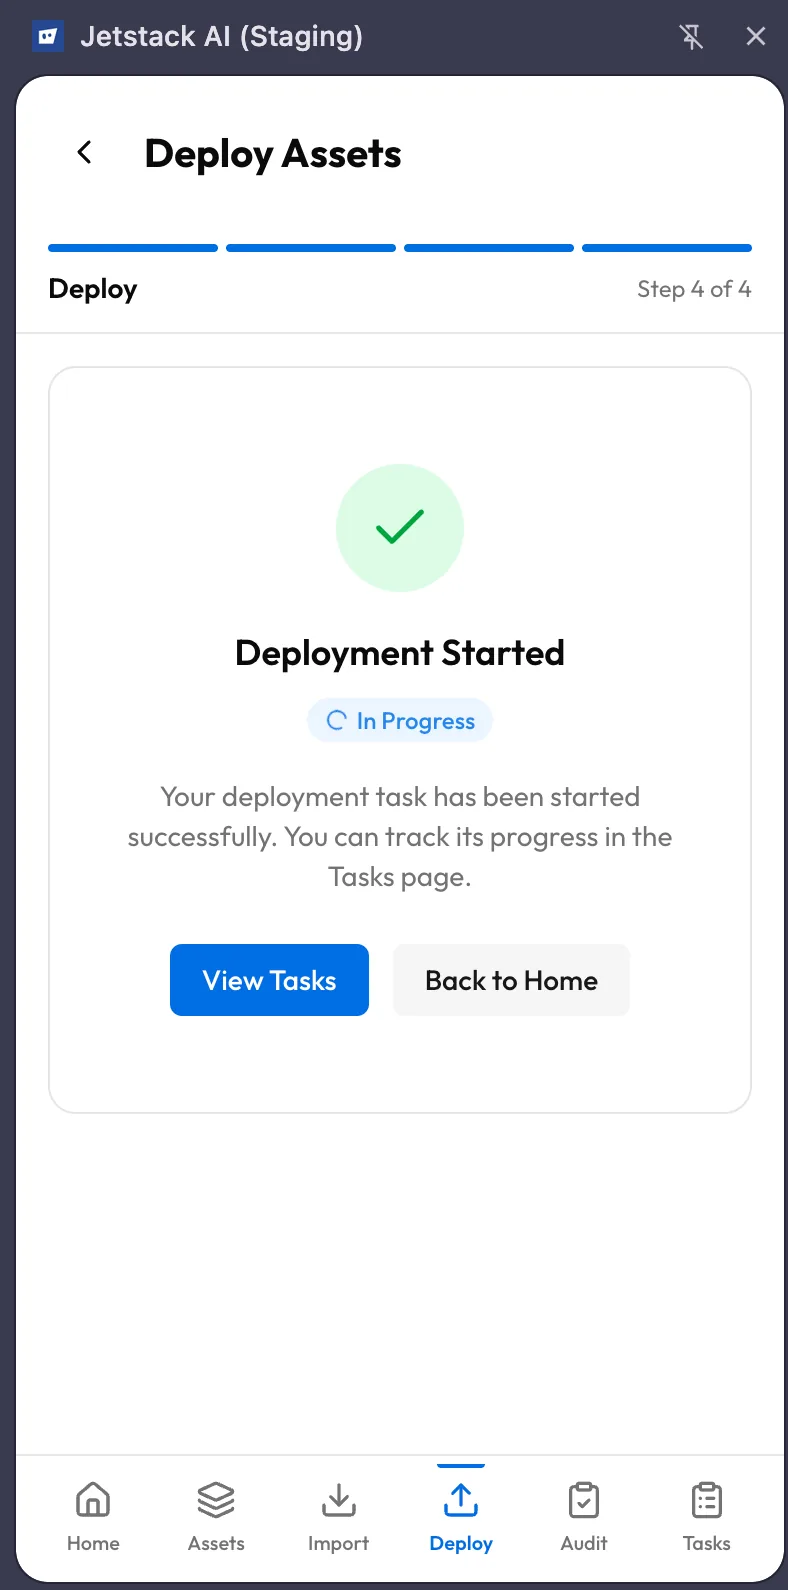
The final step executes the deployment and shows real-time progress.
Progress Tracking
Section titled “Progress Tracking”- An overall progress bar fills as assets deploy to the destination portal.
- Each asset shows its individual status: pending, deploying, completed, or failed.
- Timestamps mark when each asset started and finished deploying.
Conflict Resolution
Section titled “Conflict Resolution”During deployment, JetStack AI may encounter conflicts in the destination portal — for example, an asset with the same name already exists, or a referenced entity is missing. The extension handles conflicts using one of three strategies:
| Strategy | Behavior |
|---|---|
| Skip | The conflicting asset is skipped entirely. Other assets continue deploying. |
| Validate | The deployment pauses on the conflict and asks you to decide — update the existing asset, create a new one, or skip. |
| Auto-create | Missing dependencies (properties, objects) are automatically created in the destination portal. Existing assets with the same name are updated. |
The conflict resolution strategy is set during the mapping step (Step 2) and applies throughout the deployment. If you chose Validate, you may see inline prompts during Step 4 asking for your decision on specific conflicts.
Completion
Section titled “Completion”When all assets have been processed:
- A summary screen shows the total number of assets deployed, skipped, and failed.
- Each failed asset includes an error message explaining what went wrong.
- Successfully deployed assets are live in the destination portal immediately.
You can tap View in Tasks to open the task detail view, or return to the Home screen.
Deployment Tips
Section titled “Deployment Tips”- Start small — If you are deploying to a new portal for the first time, deploy a small batch first to verify that mappings resolve correctly.
- Check mappings carefully — Most deployment issues trace back to property or object type mismatches. Spending an extra minute in Step 2 saves debugging time later.
- Use auto-create sparingly — Auto-creating properties is convenient but can clutter the destination portal if overused. Prefer manual mapping when the destination portal already has equivalent properties.
- Monitor in Tasks — After starting a deployment, you can navigate away from the Deploy tab. The task continues in the background and its progress is always visible in the Tasks tab.
What’s Next
Section titled “What’s Next”- Running Audits via Extension — Run audits that capture premium data from internal HubSpot APIs
- Managing Tasks — Track deployment progress and manage running tasks