Importing Assets via Extension
The Chrome Extension allows you to import assets directly from the HubSpot portal you are currently browsing. Nine asset types are exclusively available through the extension because they depend on internal HubSpot session cookies that the web dashboard cannot access. This page walks through the import flow step by step.
Extension-Exclusive Asset Types
Section titled “Extension-Exclusive Asset Types”The following asset types can only be imported via the Chrome Extension:
| Asset Type | Description |
|---|---|
| Dashboards | HubSpot reporting dashboards including layout and widget configuration |
| Reports | Individual reports with their data sources, filters, and visualization settings |
| Snippets | Canned text snippets used in conversations and email |
| Goal Templates | Sales and service goal configurations |
| Lead Scores | Lead scoring rules and criteria |
| CRM Cards | Custom CRM card definitions that extend record sidebars |
| Preview Views | Custom preview configurations for CRM records |
| Playbooks | Sales playbook content and structure |
| Permission Sets | Custom permission set definitions |
These assets require HubSpot’s internal CSRF session tokens to access their APIs. The extension’s service worker has access to these tokens through the browser’s cookie store, which is why import is only possible from the sidebar.
Starting an Import
Section titled “Starting an Import”- Navigate to any page in the HubSpot portal you want to import from.
- Open the JetStack AI sidebar and tap the Import tab in the bottom navigation (or tap the Import quick action card on the Home screen).
- The Import screen loads and displays the available asset types.
Step-by-Step Import Flow
Section titled “Step-by-Step Import Flow”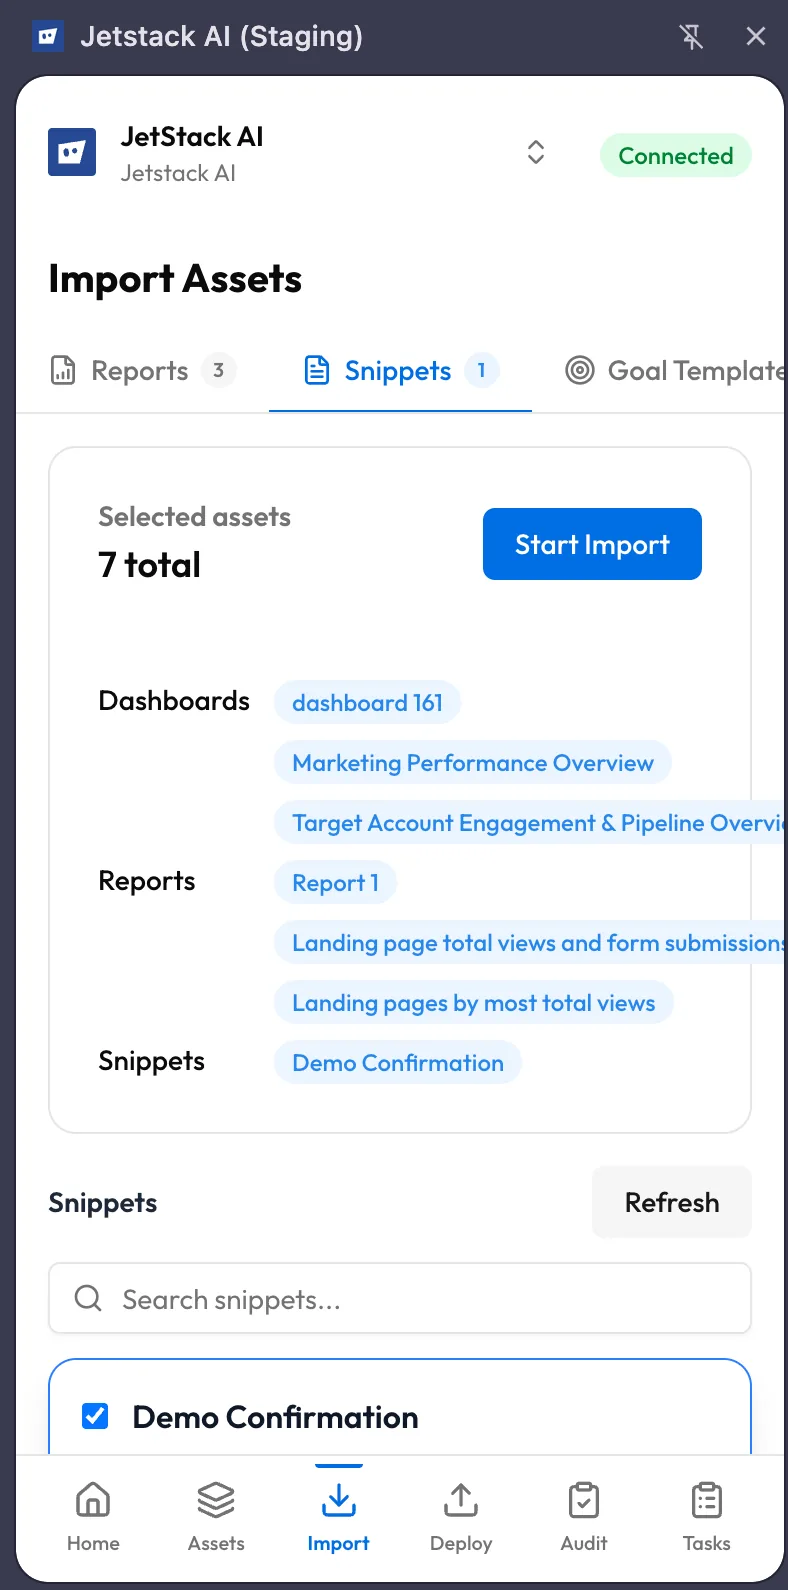
Select Asset Type
Section titled “Select Asset Type”The top of the Import screen shows a tabbed selector with all 9 asset types. Tap a tab to switch between types. Each tab displays a count of available assets in the current portal once they have loaded.
Browse and Search
Section titled “Browse and Search”After selecting an asset type, the screen lists all assets of that type found in the current portal.
- Search — Use the search bar at the top of the list to filter by name. The search is instant and case-insensitive.
- Scrolling — If the portal has many assets of a given type, scroll through the full list. Assets are loaded in batches to keep the sidebar responsive.
Multi-Select Assets
Section titled “Multi-Select Assets”You can import multiple assets at once:
- Tap individual assets to toggle their selection. Selected assets show a checkmark.
- Use the Select All option to select every asset in the current filtered view.
- The selection count displays at the bottom of the screen so you always know how many assets are queued.
- Selections persist across tabs. You can select 3 dashboards, switch to the Reports tab, select 5 reports, and import all 8 in a single operation.
Confirm and Import
Section titled “Confirm and Import”Once you have selected the assets you want:
- Tap the Import button at the bottom of the screen.
- A confirmation summary shows the number and types of assets about to be imported.
- Confirm to start the import.
Progress Tracking
Section titled “Progress Tracking”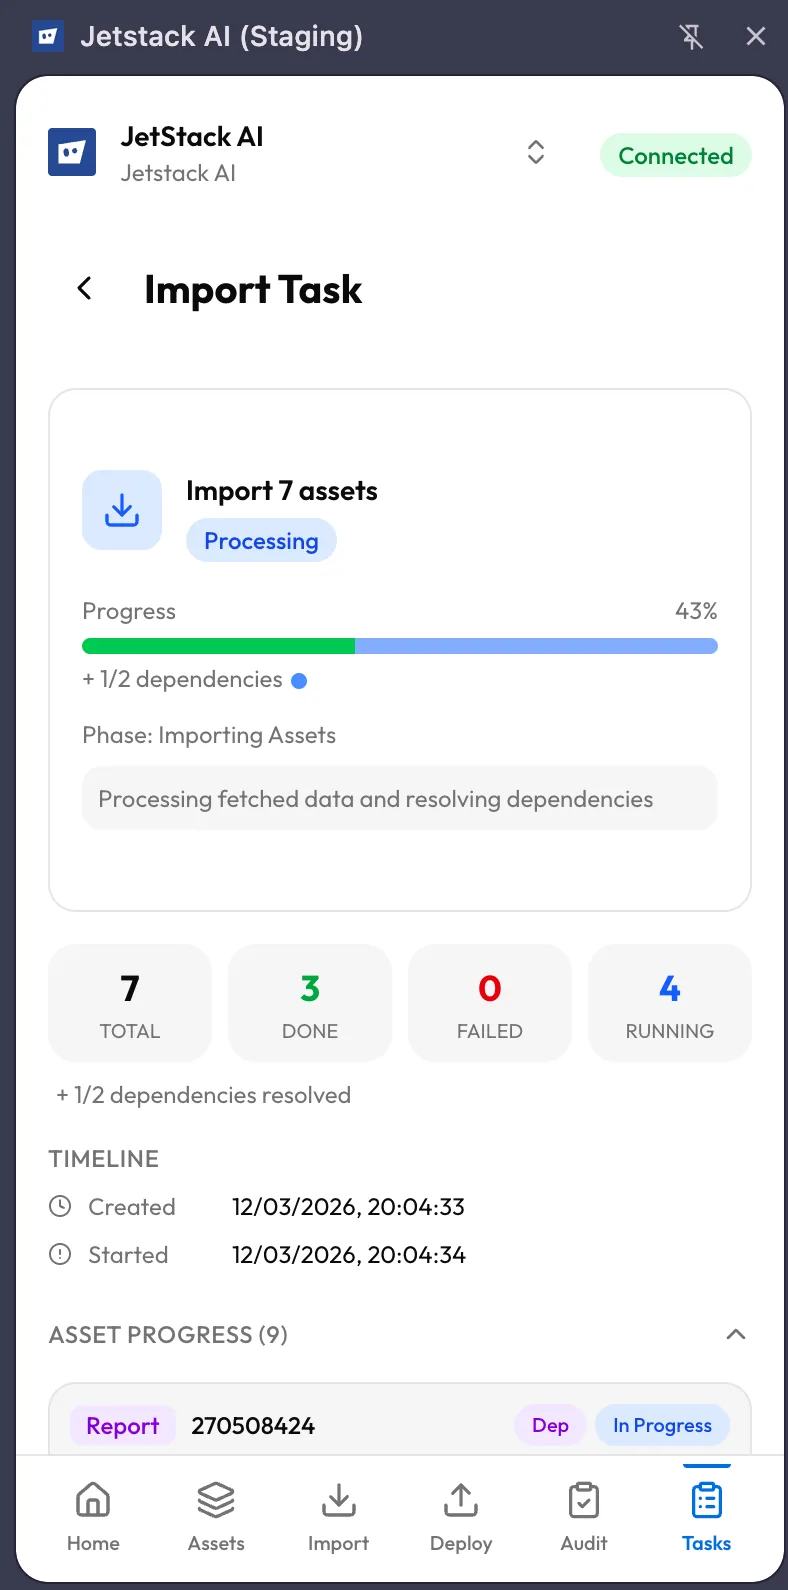
After confirming, the screen transitions to a progress view:
- A progress bar shows overall completion across all selected assets.
- Each asset shows its individual status: pending, importing, or completed.
- If any asset fails to import, it displays an error message with details. Successfully imported assets are not affected by individual failures.
- When all assets finish, the screen shows a summary with success and failure counts.
Imported assets are immediately available in your workspace — both in the extension’s Assets tab and in the web dashboard.
Difference from Dashboard Import
Section titled “Difference from Dashboard Import”The web dashboard handles a different (and larger) set of asset types through the standard implementation flow. Dashboard imports cover workflows, lists, forms, emails, pages, blogs, templates, modules, pipelines, properties, custom objects, association labels, and HubDB tables. These use HubSpot’s public OAuth APIs and do not require browser session cookies.
The extension’s 9 asset types fill the gap — they cover assets whose APIs are internal to HubSpot and only accessible from an authenticated browser session.
| Extension Import | Dashboard Import | |
|---|---|---|
| Asset types | 9 (internal API assets) | 20+ (public API assets) |
| Authentication | Browser CSRF cookies | OAuth token |
| Interface | Sidebar panel on HubSpot | Full web dashboard |
| Multi-select | Yes | Yes |
| Progress tracking | Inline in sidebar | Task detail view |
There is no overlap between the two sets. You do not need to choose one over the other — use the extension for its 9 types and the dashboard for everything else.
Tips for Efficient Importing
Section titled “Tips for Efficient Importing”- Import by portal — The extension imports from whichever HubSpot portal is active in your browser tab. If you need assets from a different portal, navigate to that portal first, then open the sidebar.
- Batch related assets — Select all related assets (e.g., a dashboard and its associated reports) in a single import to keep them grouped together in your workspace.
- Check the Assets tab after import — Switch to the Assets tab in the sidebar to verify that everything imported correctly before moving to deployment.
- Re-importing — If you import an asset that already exists in your workspace, the import updates the existing record with the latest data from HubSpot. It does not create duplicates.
What’s Next
Section titled “What’s Next”- Deploying Assets via Extension — Deploy imported assets to a destination portal
- Managing Tasks — Track import progress and manage running tasks