Installing the Extension
The JetStack AI Chrome Extension adds a sidebar panel to HubSpot so you can import assets, deploy configurations, run audits, and manage tasks without leaving the portal you are working in. This guide covers installation, first-time authentication, and verifying that the extension is active.
Requirements
Section titled “Requirements”Before you begin, confirm the following:
- Google Chrome (version 116 or later) — the extension uses Manifest V3 APIs that require a recent browser build
- A JetStack AI account — sign up at the JetStack AI web dashboard if you have not already
- At least one connected HubSpot portal — the extension interacts with portals you have already connected through the dashboard
- HubSpot access — you must be able to log in to HubSpot at
app.hubspot.com(or your regional hublet such asapp-na1.hubspot.comorapp-eu1.hubspot.com)
Step 1 — Install the Extension
Section titled “Step 1 — Install the Extension”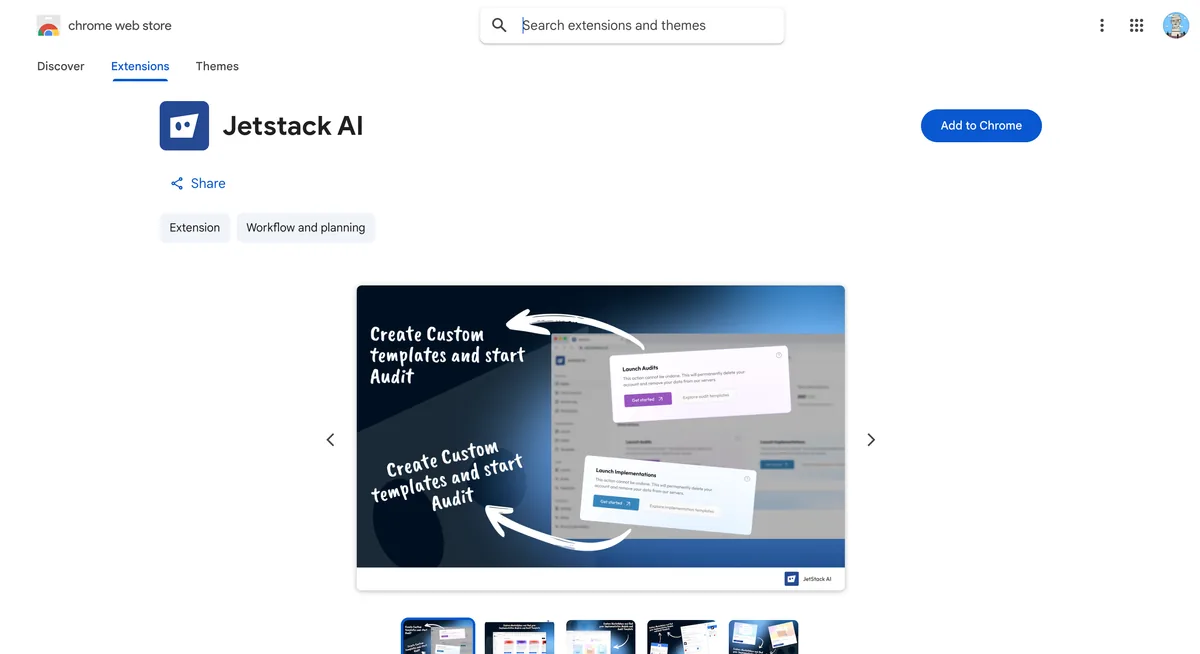
- Open the Chrome Web Store and search for “JetStack AI” or navigate directly to the JetStack AI extension listing.
- Click Add to Chrome.
- In the confirmation dialog, review the requested permissions and click Add extension.
The extension requires the following permissions:
| Permission | Why It Is Needed |
|---|---|
| storage | Persists your authentication tokens and workspace preferences locally |
| sidePanel | Opens the JetStack AI sidebar panel when you are on HubSpot |
| tabs | Detects whether the active tab is a HubSpot page |
| scripting | Injects the content script that communicates between the sidebar and HubSpot |
| cookies | Reads HubSpot CSRF cookies so the service worker can proxy internal API calls |
After installation, the JetStack AI icon appears in your Chrome toolbar. If you do not see it, click the puzzle-piece icon in the toolbar and pin JetStack AI.
Step 2 — Sign In
Section titled “Step 2 — Sign In”- Navigate to any HubSpot page (for example,
app.hubspot.com). - Click the JetStack AI icon in your toolbar, or open the Chrome side panel and select JetStack AI.
- The sidebar opens and displays the sign-in screen.
- Enter your JetStack AI credentials — the same email and password you use for the web dashboard.
- Click Sign In.
Authentication is handled by Clerk. On successful sign-in, a JWT token is issued and stored locally. The extension automatically refreshes this token before it expires, using a 20-second TTL buffer to prevent mid-request authentication failures.
If your organization uses SSO, click the SSO option on the sign-in screen and follow the redirect flow. The sidebar will return to focus once authentication completes.
Step 3 — Select a Workspace
Section titled “Step 3 — Select a Workspace”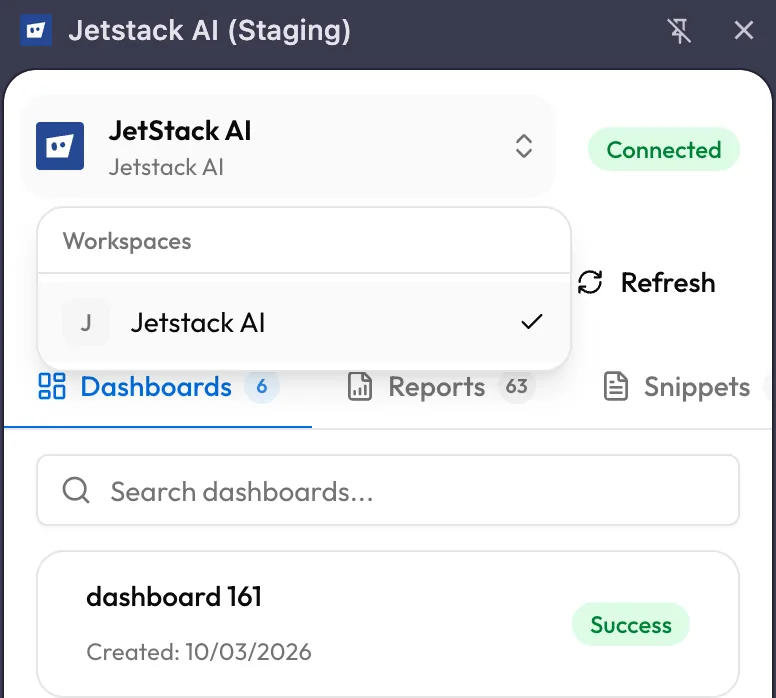
If your JetStack AI account belongs to multiple organizations, the extension prompts you to select a workspace immediately after sign-in.
- The workspace selector appears in the sidebar header.
- Choose the organization you want to work with from the dropdown.
- You can switch workspaces at any time by tapping the selector again.
All subsequent actions — imports, deploys, audits, and task views — scope to the selected workspace and its connected portals.
Step 4 — Verify the Extension on HubSpot
Section titled “Step 4 — Verify the Extension on HubSpot”With authentication complete, confirm the extension is working:
- Navigate to any page inside HubSpot (dashboards, contacts, workflows — any section).
- Open the Chrome side panel (click the JetStack AI icon or use the keyboard shortcut).
- You should see the Home screen with a time-aware greeting, quick action cards, and your asset statistics.
If the sidebar displays a “Not on HubSpot” message, check that:
- The URL starts with
app.hubspot.comor a recognized hublet (app-na1.hubspot.com,app-eu1.hubspot.com, etc.) - You are not on a HubSpot marketing page (e.g.,
www.hubspot.com) — the extension only activates on the application domain - The extension is enabled in
chrome://extensions
Supported HubSpot Domains
Section titled “Supported HubSpot Domains”The extension activates on all HubSpot application domains:
| Domain | Region |
|---|---|
app.hubspot.com | Default |
app-na1.hubspot.com | North America |
app-eu1.hubspot.com | Europe |
If HubSpot introduces new hublets in the future, extension updates will add support automatically.
Updating the Extension
Section titled “Updating the Extension”Chrome auto-updates extensions in the background. To force an immediate update:
- Go to
chrome://extensions - Enable Developer mode (toggle in the top-right corner)
- Click Update in the top-left corner
After an update, refresh any open HubSpot tabs to load the latest version of the sidebar.
Uninstalling
Section titled “Uninstalling”To remove the extension, right-click the JetStack AI icon in the toolbar and select Remove from Chrome. This clears all locally stored tokens and preferences. Your JetStack AI account, connected portals, and imported assets are unaffected — they live on the server and remain accessible through the web dashboard.
What’s Next
Section titled “What’s Next”- Extension Overview — Learn the sidebar layout, navigation, and when to use the extension versus the dashboard
- Importing Assets via Extension — Start importing assets directly from HubSpot