Selecting Assets to Import
The import wizard guides you through selecting assets from a source HubSpot portal and bringing them into your JetStack AI Asset Library. The wizard has four steps: Choose Account, Select Assets, Review and Import, and Create Module (optional).
Before You Start
Section titled “Before You Start”Make sure you have:
- At least one HubSpot portal connected to your JetStack AI organization (see Connecting Your First Portal)
- The connected portal account has sufficient permissions to read the asset types you want to import (Super Admin or Admin access is recommended)
- A clear idea of which top-level assets you want — JetStack AI will automatically handle dependencies
Step 1: Choose Account
Section titled “Step 1: Choose Account”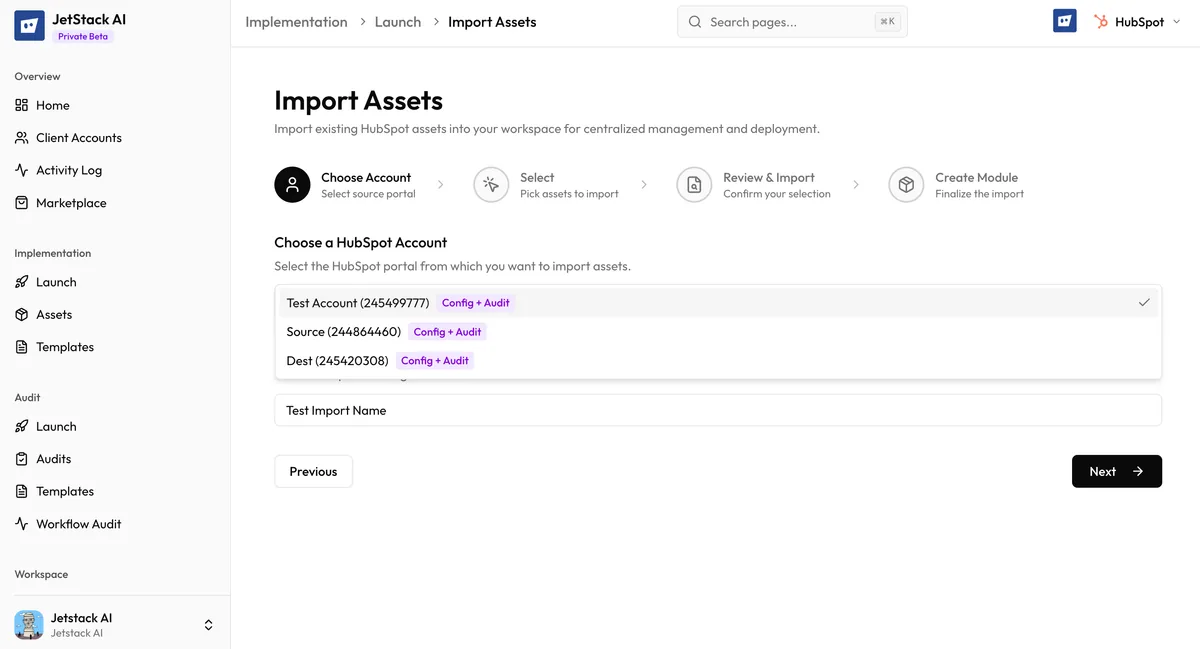
Navigate to Implementation > Launch in the sidebar to open the import wizard.
On this screen you configure two things:
- Source portal — Select the HubSpot portal you want to import from using the dropdown. Only portals currently connected to your organization appear in the list. If your portal is missing, check your Client Accounts to verify the connection.
- Import name — Give this import a descriptive name. This name appears in your Activity Log and helps you identify the import later. Use something meaningful like “Acme Corp - Lead Nurture Stack” or “Standard Onboarding Package Q1”.
Click Next to proceed to asset selection.
Step 2: Select Assets
Section titled “Step 2: Select Assets”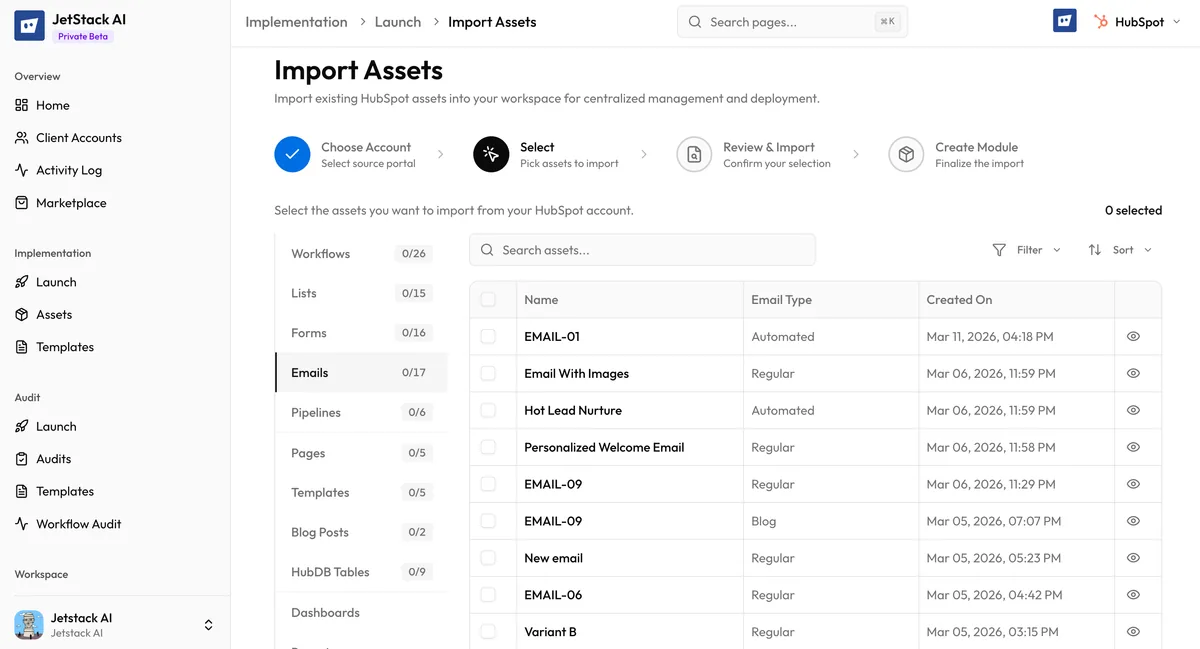
This is the main selection interface. Assets from your source portal are displayed in a tabbed layout organized by category:
- CRM Assets — Workflows, Lists, Forms, Emails, Pipelines, Association Labels, Property Sets
- CMS Assets — Pages, Templates, Blog Posts, HubDB Tables, Email Templates, Template Modules, Blogs
- Ultimate Assets — Dashboards, Reports, Snippets, Goal Templates, Lead Scores, CRM Cards, Preview Views, Playbooks (requires Ultimate plan)
Browsing Assets
Section titled “Browsing Assets”Each tab displays a paginated list of assets fetched from the source portal. For each asset you can see:
- Asset name — the name as it appears in HubSpot
- Asset type — the specific type within the category
- Last modified date — when the asset was last updated in HubSpot
Finding Specific Assets
Section titled “Finding Specific Assets”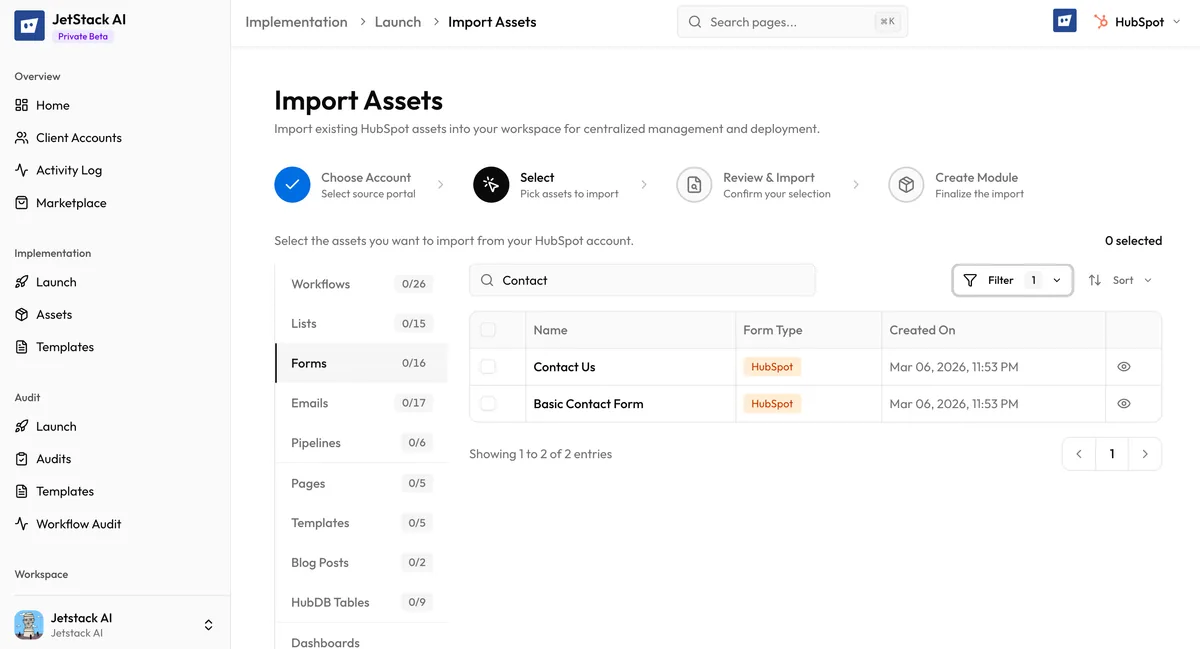
The selection interface provides several tools to locate the assets you need:
- Search — Type in the search bar to filter assets by name. The search runs across the currently active tab.
- Filter — Narrow results by asset type within the tab. For example, within CRM Assets you can filter to show only Workflows or only Forms.
- Sort — Reorder results by name or last modified date, ascending or descending.
- Pagination — Navigate through large asset lists using the page controls at the bottom of the list.
Selecting Assets
Section titled “Selecting Assets”Click the checkbox next to each asset you want to import. You can select assets across multiple tabs — your selections persist as you switch between CRM, CMS, and Ultimate tabs.
You do not need to manually select dependencies. If you select a workflow that references a list and an email, JetStack AI will automatically detect and import the list and email during the import process. Select only the top-level assets you care about and let the dependency engine handle the rest.
To select multiple assets quickly:
- Use the select all checkbox at the top of the list to select everything on the current page
- Combine with filters to select all assets of a specific type
A selection counter at the bottom of the screen shows how many assets you have selected across all tabs.
Click Next to proceed to review.
Step 3: Review and Import
Section titled “Step 3: Review and Import”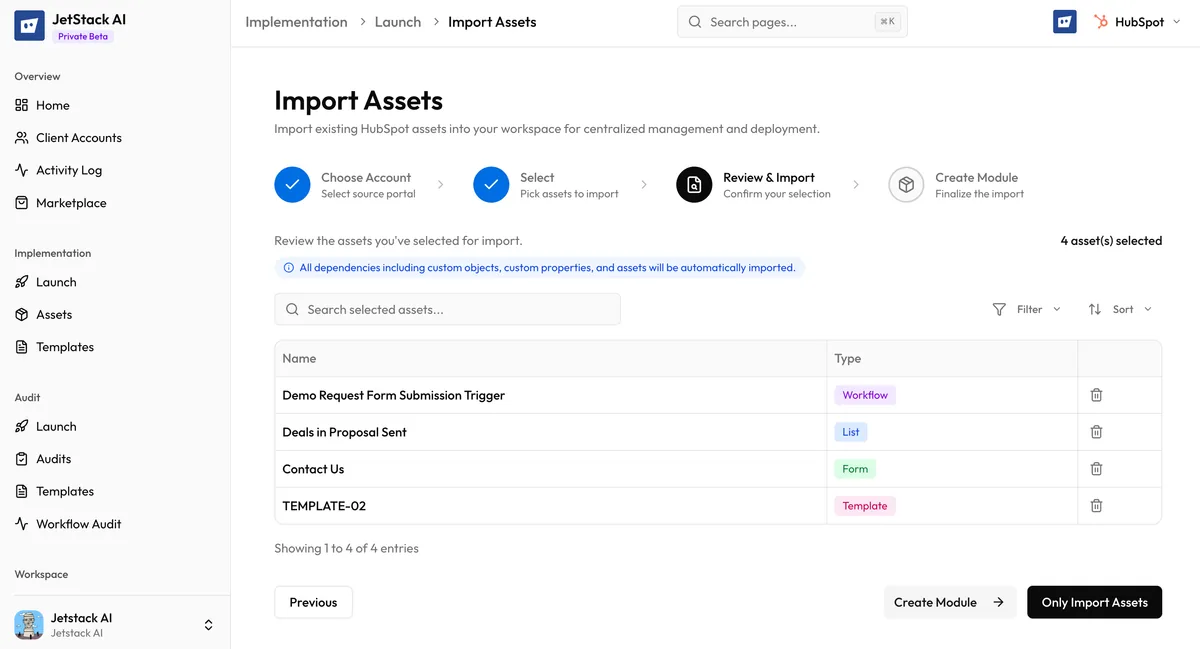
The review screen shows a grouped summary of everything you are about to import:
- Assets are grouped by type (all workflows together, all lists together, etc.)
- Each group shows the count of assets selected
- Each individual asset is listed with its name
Adjusting Your Selection
Section titled “Adjusting Your Selection”If you change your mind about any asset at this stage:
- Click the remove button next to any individual asset to exclude it from the import
- Remove an entire group if you decide you do not need that asset type
Take a moment to verify that the list looks correct. This is your last chance to adjust before the import begins.
Import Options
Section titled “Import Options”At the bottom of the review screen, you have two options:
- Create Module — Imports the assets and proceeds to Step 4 where you can bundle them into a reusable module. Choose this if you plan to deploy these assets as a group to multiple portals.
- Only Import Assets — Imports the assets directly into your Asset Library without creating a module. Choose this if you just need the assets in your library for individual selection during deployment.
Click your preferred option to start the import. JetStack AI begins fetching assets from the source portal immediately. Progress is tracked in the Activity Log where you can monitor each asset as it is processed.
Step 4: Create Module (Optional)
Section titled “Step 4: Create Module (Optional)”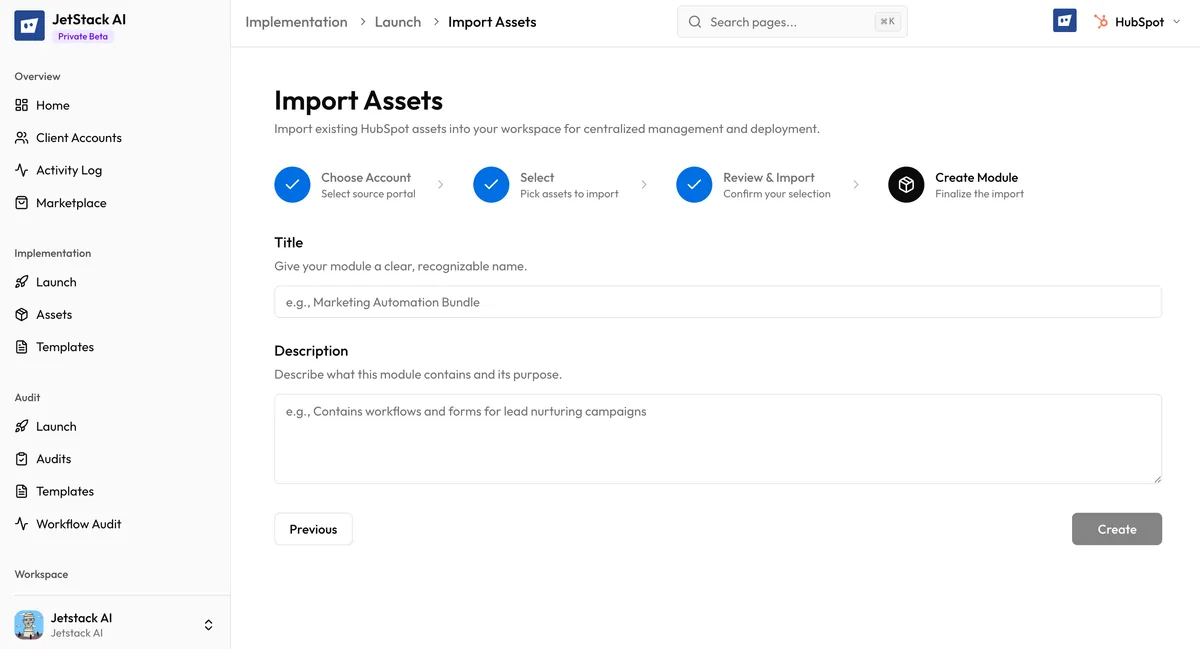
If you chose Create Module in the previous step, the wizard presents a module creation form after the import completes:
- Module title — Give the module a clear, descriptive name. This is how it appears in your Asset Library and in deployment selection. Examples: “Enterprise Onboarding Kit”, “Blog Launch Package”, “Sales Pipeline v2”.
- Module description — Add a brief description of what this module contains and its intended use case. This helps teammates understand the module’s purpose without opening it.
Click Create to finalize the module. The module now appears in your Asset Library alongside individual assets, grouping all the imported assets under a single entry.
If you skip this step or chose “Only Import Assets” earlier, your assets are still fully available in the Asset Library — they are just not grouped into a module. You can always organize assets into modules later from the library.
After Import
Section titled “After Import”Once the import completes:
- All selected assets (plus any auto-detected dependencies) appear in your Asset Library
- Each asset shows its source portal, import date, and dependency relationships
- The import is logged in your Activity Log with a success or partial-failure status
- You can immediately proceed to deployment or continue importing more assets
If any assets failed to import, check the Activity Log for error details and see Troubleshooting Import Failures for resolution steps.
Next Steps
Section titled “Next Steps”- Dependencies and Auto-Import — Understand why additional assets may appear in your library
- Creating Modules from Imports — Deep dive into module creation and usage
- Browsing the Asset Library — Find and manage your imported assets
- How Deployment Works — Deploy your imported assets to a destination portal