Quickstart Guide
This guide walks you through the fastest path from sign-up to your first action in JetStack AI. By the end, you will have a connected portal and either an audit running or assets imported — your choice.
Time required: Under 10 minutes.
Step 1: Sign Up and Create Your Organization
Section titled “Step 1: Sign Up and Create Your Organization”- Go to app.jetstack.ai and click Get Started.
- Sign up with your email or Google account.
- Enter your organization name — this is your team workspace. Use your agency or company name.
- Choose your plan. You can start with a Pro plan at $525/month or go with Ultimate at $1,250/month for the full feature set. See Plans and Limits for a detailed comparison.
Once your organization is created, you land on the Home dashboard. Jetty, the JetStack AI mascot, greets you and surfaces quick actions to get moving.
Step 2: Connect Your First Portal
Section titled “Step 2: Connect Your First Portal”You need at least one connected HubSpot portal before you can import assets or run an audit.
- From the Home dashboard, click the Connect Portal action card — or navigate to Client Accounts in the sidebar.
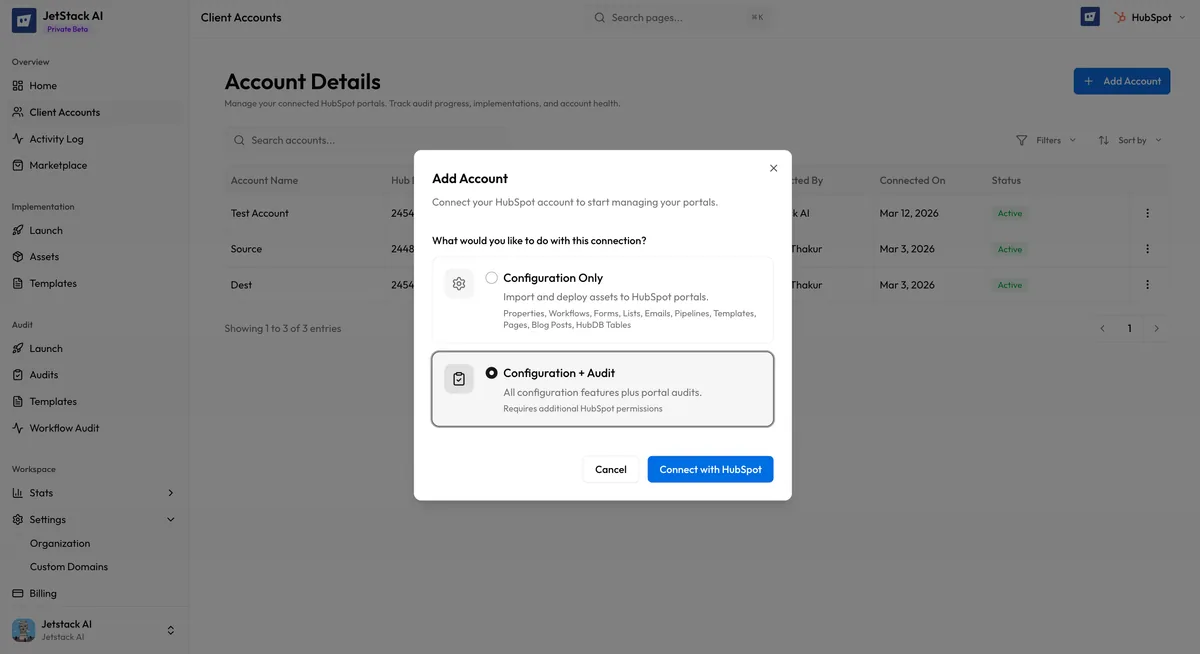
- Click Add Portal.
- You are redirected to HubSpot’s OAuth authorization screen. Sign in with an account that has Super Admin or Admin access to the portal you want to connect.
- Review the requested scopes and click Authorize.
- You are redirected back to JetStack AI. Your portal now appears in your Client Accounts list with its name, Hub ID, and connection status.
That is it. Your portal is connected and ready to use.
For a deeper look at scopes, connection types, and troubleshooting, see Connecting Your First Portal.
Step 3: Choose Your First Action
Section titled “Step 3: Choose Your First Action”With a portal connected, you have two primary paths:
Option A: Run an Audit
Section titled “Option A: Run an Audit”An audit scans your connected portal against 450+ data points and generates AI-powered findings with actionable recommendations.
- Navigate to Audit > Launch in the sidebar.
- Select the portal you want to audit from the dropdown.
- Click Start Audit.
- JetStack AI begins scanning. Progress updates appear in real time in the Activity Log. A full audit typically completes in a few minutes depending on portal size.
- When finished, click into the audit to review findings organized by category — each with a severity level, explanation, and recommended fix.
Option B: Import Assets
Section titled “Option B: Import Assets”An implementation starts by importing assets from a source portal into JetStack AI, where you can review them before deploying to a destination portal.
- Navigate to Implementation > Launch in the sidebar.
- Select your source portal — the portal you want to import assets from.
- Choose the asset types you want to import: workflows, lists, forms, emails, pipelines, pages, templates, blog posts, HubDB tables, properties, or any combination.
- Click Import. JetStack AI fetches the selected assets, resolves dependencies between them, and stores them in your workspace.
- Review the imported assets in Implementation > Assets. From here you can select which assets to deploy and choose a destination portal.
Step 4: Install the Chrome Extension (Optional)
Section titled “Step 4: Install the Chrome Extension (Optional)”The JetStack AI Chrome Extension adds a sidebar panel directly inside HubSpot, so you can interact with JetStack AI without switching tabs.
- Visit the Chrome Web Store and search for JetStack AI.
- Click Add to Chrome and confirm the installation.
- Navigate to any HubSpot portal page. Click the JetStack AI icon in your browser toolbar to open the sidebar.
- Sign in with the same account you used for the dashboard.
- The extension now shows relevant asset details, audit findings, and implementation actions in context alongside your HubSpot work.
The extension is not required — everything is accessible from the web dashboard. But if you spend most of your time inside HubSpot, the extension keeps JetStack AI within arm’s reach.
What You Have Now
Section titled “What You Have Now”After completing these steps, you have:
- A JetStack AI organization and workspace
- At least one connected HubSpot portal
- Either an audit with findings to review or imported assets ready for deployment
- Optionally, the Chrome Extension for in-context access
Next Steps
Section titled “Next Steps”- Connecting Your First Portal — Deep dive into OAuth, scopes, connection types, and troubleshooting
- Understanding the Dashboard — Full walkthrough of every section and feature in the JetStack AI workspace
- Plans and Limits — Understand what is included in each tier and how limits work
- Running an Audit — Detailed guide to launching and interpreting audits
- Importing Assets — Complete walkthrough of the import process